exergaming round!
The controller is gonna be the mighty Bodypad!
We'll play two games:
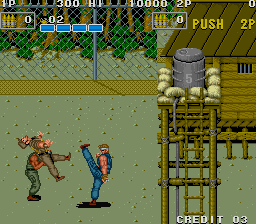
1. Gang Wars
2. Prisoners of War
below I'll explain how to configure the bodypad for them. Both games
will be identically configured. But let me rapidly explain the
principles of the Bodypad, the Bodypad façon de vivre. ;-)
In short you have 4 pads, 2 above the knees, 2 above the elbows. The
pads above the knees send a button on signal when they are
pressed. However the pads above the elbows do the opposite, they send
a button on when they are released! On top of that you've got a D-pad
in the left hand + a trigger, and a 4 more buttons on the right hand +
a trigger.
The Bodypad allows you to:
1. trigger the legs' pads by basically kicking as to press the "kick
pads"
2. trigger the arms' pads by stretching you arms out to release the
"punching pads"
3. control the D-pad and the trigger with your left hand
4. control 4 extra buttons and the trigger with you right hand
The 4 pads (left kick, right kick, left punch, right punch) + the 2
triggers (left and right triggers) are assignable. The other remaining
buttons on the right hand controller are not, but of course we will
assign them to the controls of our choice directly in the games.
So, let's do it! First of all plug the Bodypad receiver to the USB
port (you need a XBox to USB adapter). Configure it as follows (some
red dots have been added to make it up for the bad shot)
Then place all the pads on your body, follow the provided manual for
that. My advice is to start with the legs, then the elbows, then the
hands. It might well take you 10 minutes the first time but don't
despair, as time goes it will take you less and less time (it takes
me no more than 30 seconds).
Note: use long trousers and long sleeve shirt for maximum comfort.
OK, now that you are wearing the Bodypad, turn it on (the power switch
is on the left hand controller, don't forget to add the 3 AAA
batteries in there). So far a blinking green light should have been
observed on the receiver, once switched on, the green light should
stop blinking and stay on.
We are ready to fire mame! But first you might want to use a joystick
monitoring software to check that everything is in order (I use
jstest-gtk for Linux). This is also convenient to get a feel of how to
control the kick and punch pads.
Now we're going to launch and configure Gang Wars, you want to
configure Gang Wars, the following screenshot shows how the
configuration looks like on my version of mame
Gang Wars input configuration
that is:
- L button on the right hand controller is mapped to insert credits
- R button on the right hand controller is mapped to start
- D-pad is mapped as expected
- L and R kicks are mapped to button 1
- L and R punched are mapped to button 2
- White button on the right hand controller (see picture below) is
mapped to button 3 (jump in the game)
- L and R triggers are mapped to button 1 as well
The reason L and R triggers are mapped to button 1 is so that in case
you are too tired of body kicking (which is by far the most
exhausting) you can use the trigger instead. Of course I highly
encourage you to body kick!
Try to follow as closely as possible what the character is doing to
feel as embodied as possible. So for instance if the character is
facing to the right he is gonna punch with the left arm, so punch with
the left arm as well. When he faces left, then punch with the right
arm. If he's hold a bottle with the left arm then do the same bottle
knocking movement with your left arm, etc.
Please note that it's probably gonna be very frustrating at first, you
have to persevere, rapidly you're gonna be at ease and start enjoying
it. I guess the first challenge is gonna be to complete the first
stage, I'm limiting myself to 3 credits but frankly you can use as
many credit as you want!
For Prisoners of War, the setting are almost identical, the only
difference is that button 2 and button 3 are swapped, that is
- White button on the right hand controller is mapped to button 2
(jump in the game)
- L and R punched are mapped to button 3
See a snapshot of my configuration for P.O.W.
P.O.W input configuration
Same thing for P.O.W. Try to complete stage 1, using as many credits as
you want if you like. Note that once you take the rifle you can use
the trigger to shot.
If you're serious about it you're gonna break a hell of a sweat. I'm
impatient to know how it goes!
Last remark, this round will not be counted in the overall scores.
So, 1, 2, 3... kick, kick, kick, punch, punch, punch, go, go, go! :-)


